To Assign a creative, please follow the steps below:
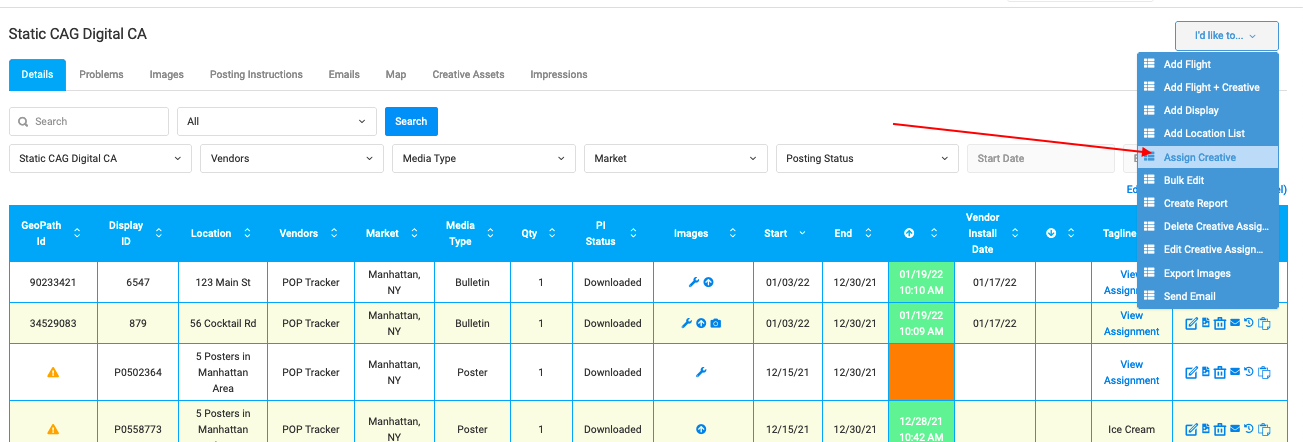
1. Open campaign > navigate to the 'I'd Like To' drop down on the top right corner of the screen > Assign Creative
2. A checkbox column will appear to the left of the chart where you can select individual units or all units. After selecting your units, click 'Next' above the chart.
3. Fill in the pop up.
- Use the numerical drop down to select the number of creatives you wish to upload to the selected units. In the chart:
(a) Creative ID will always auto-generate but if you wish to add/create your own, add your unique ID.
(b. Creative Image is a required field. It can be selected from your device or use drag drop method. Image files (.jpg, .jpeg, .png), Excel, PDF, Word, PPT can all be imported as a creative image file.
(c) Add tagline. If field is left blank, we will auto-fill with current display tagline.
(d) Add Special Instructions.
(e) Rotation allocation will automatically allocate evenly between the number of creatives, but you can manually adjust the allocation percentage.
(f) Day Parting, Dynamic Triggers, and Audience data can be added as well.
4. After completing the assignments, each selected display will show a wrench icon to represent the creative images assigned. The taglines will hyperlink, which open a pop up of the full assignment details and the images provided by the vendor.
5. When you're ready to issue PIs, click the Posting Instructions tab. The images column will show each wrench icon available. We recommend having a creative image across every row but it is not a requirement. Once ready, follow the Posting Instructions workflow.


