To assign a creative from the library, please follow the steps below:
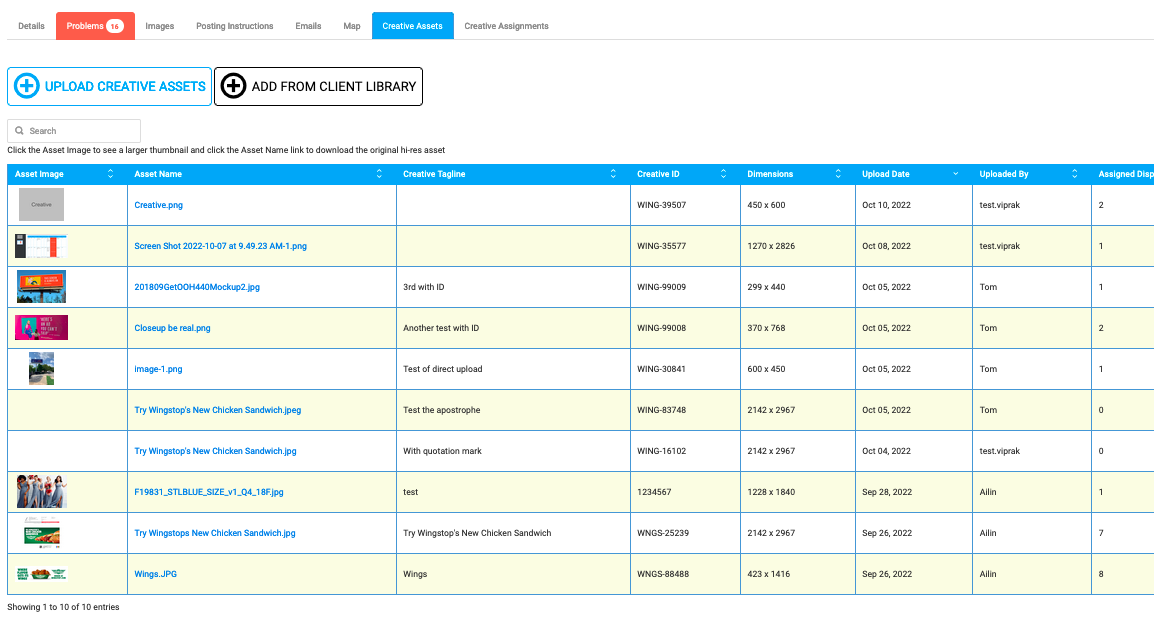
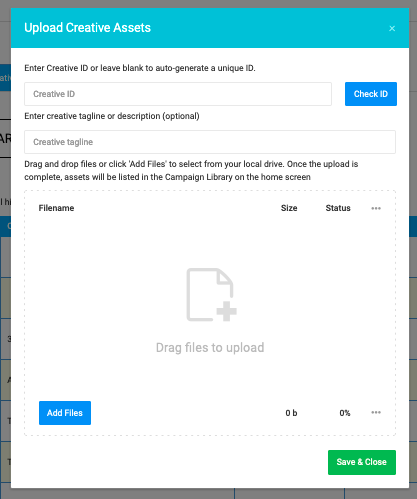
1. Open the campaign and navigate to Creative Assets tab on the top menu. Click Upload Creative Assets to add a new Creative Image to the campaign (once a creative asset is imported, we'll store the creative in the Client Library; if you're reusing a creative from another campaign, select "Add from Client Library")
2. Assets are grouped into a Creative ID and multiple assets can be uploaded simultaneously. Creative tagline or description helps identify the creative message
- if you wish to add assets to an existing creative group, use the same Creative ID)
> Add assets for each design into its own creative ID. Asset files types can be .jpg, .jpeg, .png, Excel, PDF, Word, and/or PPT.
> Click Save & Close.
POP Tracker will create an asset chart showing filename (Asset Name), Tagline, Creative ID, Dimension of the creative, and details of creative import.
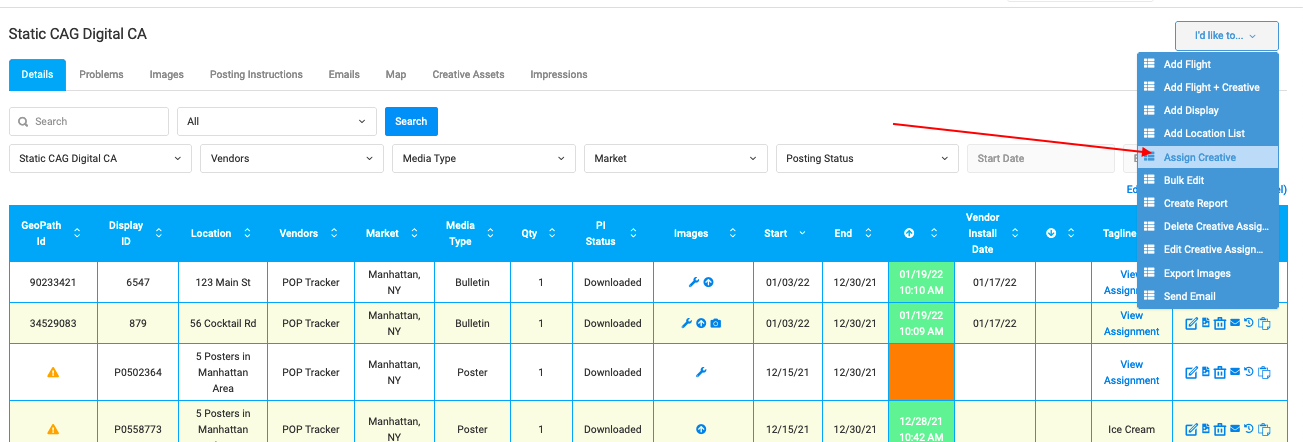
3. Once assets are available > open Details tab from the top menu bar > navigate to the 'I'd Like To' drop down on the top right corner of the screen > Assign Creative
2. A checkbox column will appear to the left of the chart where you can select individual units or all units to assign creatives. After selecting your units, click 'Next' above the chart.
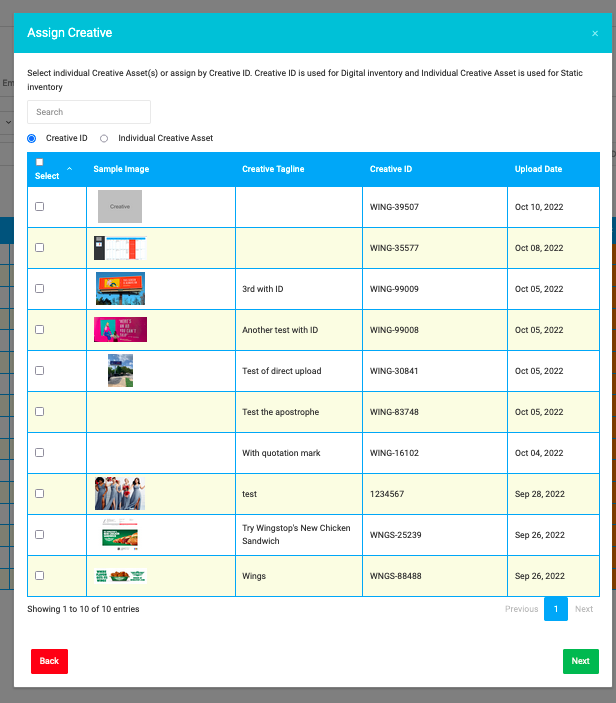
3. A pop up will appear with your creative library.
Select individual Creative Asset(s) or assign by Creative ID. Creative ID is used for Digital inventory > POP Tracker will map the corresponding asset from your Creative ID to the display based on matching asset dimensions to Pixel Height & Width; Individual Creative Asset is used for Static inventory. Click Next.
3. If appropriate, add any missing data (Creative ID, Creative Image, Creative Tagline will auto-upload):
(a) Special Instructions.
(c) Rotation allocation will automatically allocate evenly between the number of creatives, but you can manually adjust the allocation percentage.
(d) Day Parting, Dynamic Triggers, and Audience data can be added as well.
4. After completing the assignments:
- The taglines will hyperlink, which open a pop up of the full assignment details and the images provided by the vendor.
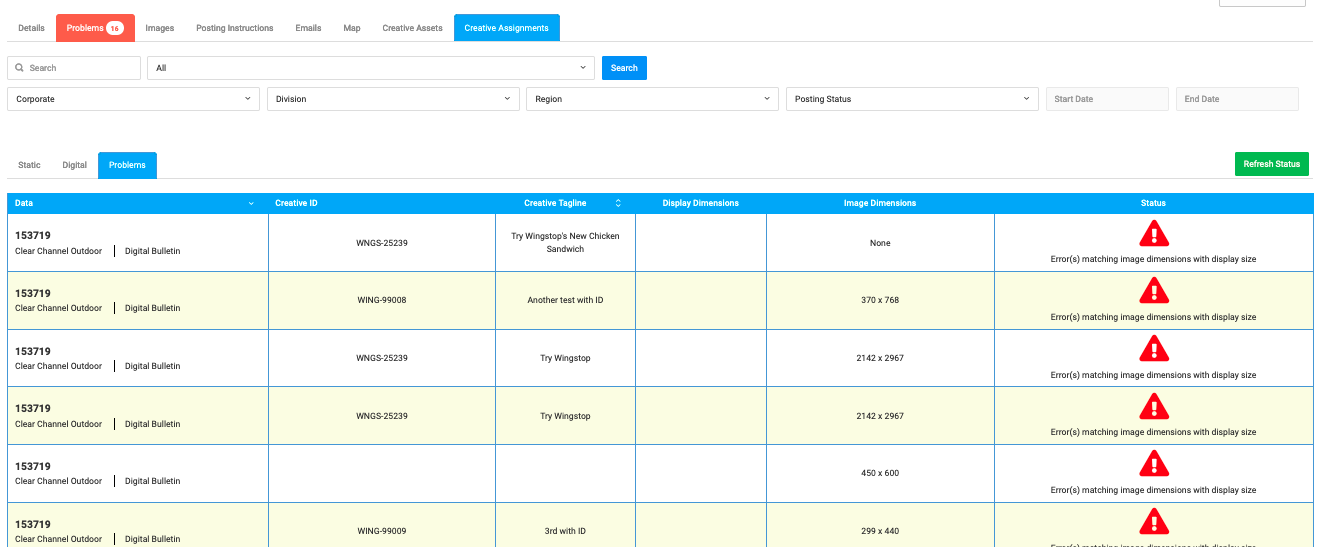
- Each selected display will display a wrench icon to represent a creative asset has been assigned. Static units will show the specific creative file assigned. Digital units will import the image available with the corresponding dimensions. If the sizing does not match, the campaign will show a blank image and an error message, until correct image size is provided or size of the display is corrected.
- Use the Creative Assignments tab on top menu bar to identify and fix any unmatched creatives.
5. When you're ready to issue PIs, click the Posting Instructions tab. The images column will show each wrench icon available. We recommend having a creative image across every row but it is not a requirement. Once ready, follow the Posting Instructions workflow.
