1. When you log into the system you will see the home page first.
2. Scroll down past the calendar and you will see a list of all available Advertisers. Click on the + sign next to the advertiser you are working on to see current campaigns.
3. Identify the campaign you are uploading to and click on the Campaign Name or Open Campaign link to see the campaign details.
4. Identify the Unit you are looking for. In the far right column click on Add Images & Dates.
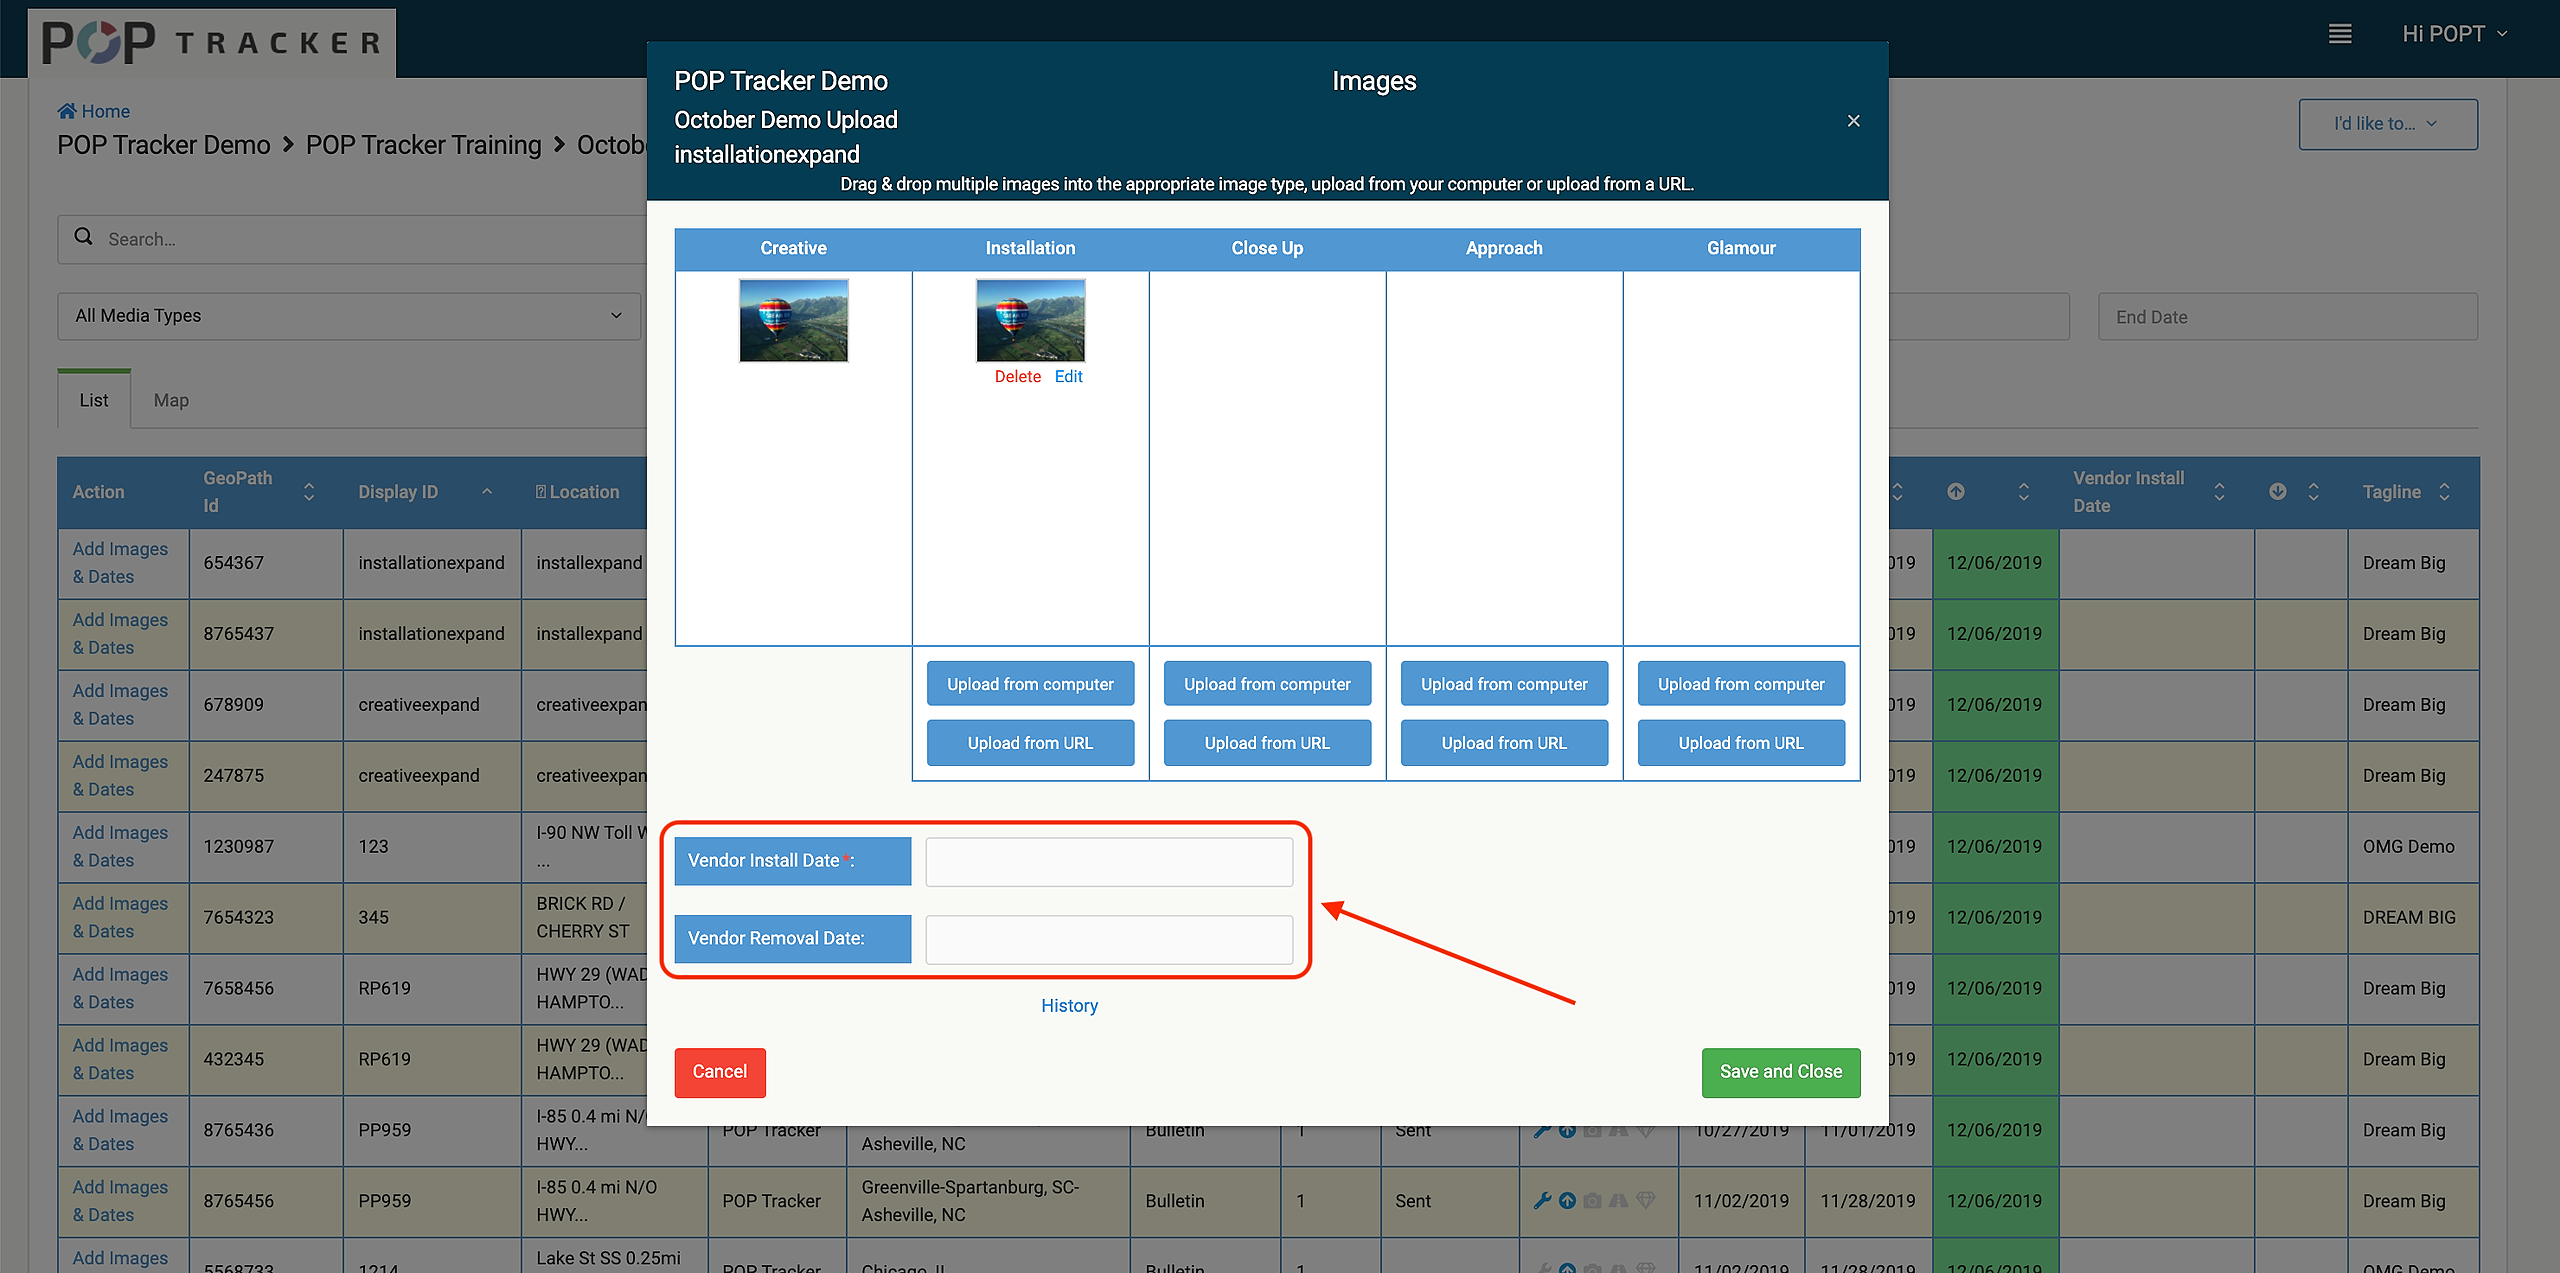
5. A popup screen will appear that allows you to upload images, add the Vendor Install Date, and also enter a Removal Date. You can add one or multiple images to each column.
The system will show different column headings for Static and Digital Units and we also allow custom naming for agency partners. The standard labels are:
Static Units - Creative, Installation, Close Up, Approach & Glamour
Digital Units - Creative, Screen or Webcam, Digital Close Up, Play Report or Approach, & Final Play Report
You can drag and drop images to a column or click on the button below the column (Upload from Computer) to open a finder box to select an image on your computer. Once selected you will see a thumbnail of the image in the column.
Add an install date (members only) or takedown date (optional depending on campaign requirements set by Ad Agency).
6. When you have uploaded all the images and dates, select Save and Close.


